21 Ways to Teach with Echo360 – 14) Record in-class clinical procedures
This is the fifteenth blog in our how-to series for educators and example 14 out of 21 ways to teach with Echo360. Read the introduction to this series here.
Why should I record my clinical procedures?
Have you ever been in a situation where there was a live demonstration being done around a table, and you were the unfortunate one furthest away and unable to fully see what was going on? If you are in a medical setting, these often are set up to demonstrate core clinical skills, such as suturing, cannulation and others. Practice is certainly helpful if you are a kinesthetic learner, but what if you are more of a visual learner? Also, watching or performing the action in class is good but what if you are struggling to follow the procedure and need time to play it back, slow it down and rehearse it yourself? Recording practical demonstrations, such as clinical procedures, not only provides a supplementary learning resource for the in-class students to playback in their own time, but can be reused for other teaching activities, such as in-class quizzes, flipped learning exercises, and as a stand-alone repository for self-directed learners.
How can I do that?
There are several methods available for instructors to make this happen, depending on your situation or room configuration. The great news is, this approach will work regardless of whether you have a high tech set up or simple low-tech solution. The trick is to plan how you will record the visuals and commentary in advance, and then to be as natural as possible during the recording. Similarly, if you are planning to allow the students to record themselves, the tech needs to be as easy and uninstructive as possible, and the students need to have consented to being recorded.
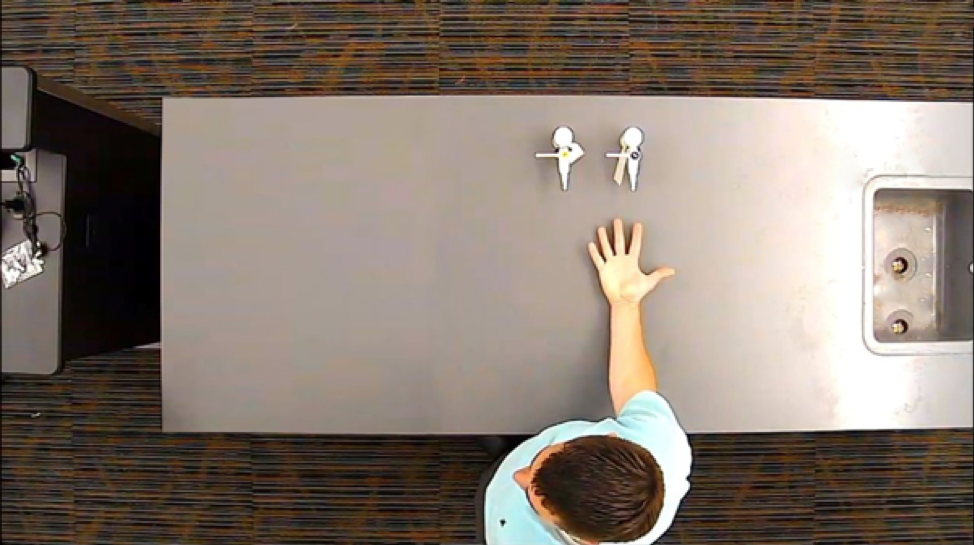
In many teaching rooms, cameras that are mounted into the ceiling can be controlled from the podium in the room and give a great viewpoint for a recording. This is means that you would simply select the document camera from the podium and have it record as you’re performing your demonstration. There is nothing extra for you to do.
Or you may use something as basic as your own webcam to accomplish the same thing as shown by the professor below. One of my favorites is to record using the document visualizer for small-scale demonstrations, such as suturing.
Making the recording couldn’t be easier.
If you are in class and have lecture recording equipment in place, simply reposition the video and manually start the recording using Classroom Capture (CCAP), or your podium-based controls.
Alternatively, if you are in a simulation or practical space, you could record the procedure using Personal Capture (PCAP) from a laptop.
Anything else I should be aware of?
Consider if this material is something you would like to share outside the classroom with either colleagues or others in your field. In working with students, you may need to get a consent agreement signed from the student who were in the demonstration for use outside of the classroom. Most of the time students are completely fine with this but it’s a best practice to get signed off on.
The recent addition of ASR to the Echo360 platform allows for all your lectures to be transcribed automatically. This provides a text copy of the instructor commentary that allows students to click on words or phrases in the transcript to jump to key sections of a recording or search across all the commentary.
By recording your lectures, you are providing them with not just the visuals from the day’s demonstration but another opportunity to see key works in context and how they relate to the subject matter.
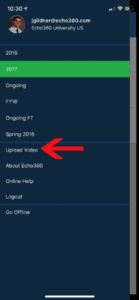
Often the space itself doesn’t lend itself to a webcam or even that of a mounted ceiling camera. Making use of your mobile device can be a most effective tool in many cases. The Echo360 mobile app allows you to record and publish videos directly from your smartphone to your class or library.
Does it work?
This approach has been proven to work across many different clinical, engineering, law and science environments, with significant benefit to learners required to watch back the recording at their own pace. For example, with 60-120 students to teach in a lab, Frank Cerfogli, a Clinical Assistant Professor at the Iowa State University College of Veterinary Medicine, chose to record the surgical techniques and procedures he typically demonstrates in a lab. Students are expected to watch the videos prior to hands-on practice time in the lab. He describes his approach in the following way, “The first recording I make is narrated, and I describe the procedure in detail, step-by-step, how to perform the required surgical pattern and how to tie the knot. My second video is only partially narrated, and I perform the procedure at a moderate speed. This helps the students get an idea of the flow of the pattern. My final video is done at full speed without narration. Students can see exactly what the procedure should look like when they do it and we require they match the pattern, tie the knot correctly, and do it at full speed.” Students are then recorded practicing the procedures themselves in the lab and these videos are reviewed by Frank Cerfogli within the Echo360 environment; feedback is also posted using the discussion tool.
An alternative approach is described in The Flipped Classroom Improved Medical Students Performance (Street et al, 2014). They reveal how they adopted a ‘Drilling on Concepts’ method in a Year 1 basic science module, ‘Integrative Function and Its Cellular Basis’. The first 6 weeks of the module were taught using a flipped classroom model, whilst in the final 6 weeks they replace the lectures with online classes, consisting of a video and 1-3 quiz questions. Results suggested that there was a negligible increase in instructor preparation time compared to giving lectures, and that there was a small, but statistically significant, increase in student performance when using the pre-prepared screencasts.
If you have found this blog helpful, but missed the previous posts in the series, here they are:
- Intro: A New Blog Series for Educators: 21 Ways to Teach with Echo360
- Part one: How to Record Your Class with Echo360
- Part two: How to Record an Asynchronous Screencast with Echo360
- Part three: How to Schedule Recordings of Your Classes with Echo360
- Part four: Lights, Camera, Action! Teaching and Live Broadcasting with Echo360
- Part five: Increasing Student Engagement: Creating Student Polls, Questions, and Other Activities
- Part six: Increasing Student Engagement: Facilitating In-Class Discussions and Group Work
- Part seven: Increasing Student Engagement: Delivering Live Interactive Teaching to Off-campus Learners
- Part eight: Increasing Student Engagement, Without Recording
- Part nine: Flip Your Teaching with Interactive Presentations
- Part ten: Flip Your Teaching with Seeded Discussions
- Part eleven: Flip Your Teaching with Screencasts
- Part twelve: Deliver Interactive Classes Using the PowerPoint Ribbon
- Part thirteen: Flip After Class with Discussions and Screencasts
Learn more about Echo360.


