Location-based attendance: How it’s done!

The days of calling roll are over! With participation numbering in the 100s sometimes, it just is not a good use of valuable teaching time. But you still want to make sure your class is present, which is where our location-based attendance feature can help. Using location-based attendance is an easy and reliable way to ensure your participants are present during your course.
Not interested in location-based attendance, but you still want to skip calling roll? Our check-in attendance feature may be more your style.
For now, let’s learn how to successfully track your students using location-based attendance:
1 Log in to your Echo360Point account and view your course
Even if you don’t use Echo360Point as an engagement tool, you can still use our attendance feature to take and track attendance. You just need to create an account and add a course within Echo360Point web.
2 Verify or add your participants
Once you are in your course, you will want to add your participants. You can do this manually by selecting Add Participants and entering their email addresses. Students will be invited to complete registration (if needed) and join your course.
Do you utilize a Learning Management system?
No need to add email addresses! You can sync your participants from your LMS by adding your course from Blackboard, Brightspace, Canvas or Moodle.
3 Open Attendance
Now that you have participants enrolled in your course, you are ready to open attendance! If you won’t be utilizing the location-based feature, you can simply select Open Attendance to get started.
For location-based attendance, you will need to set your location first!
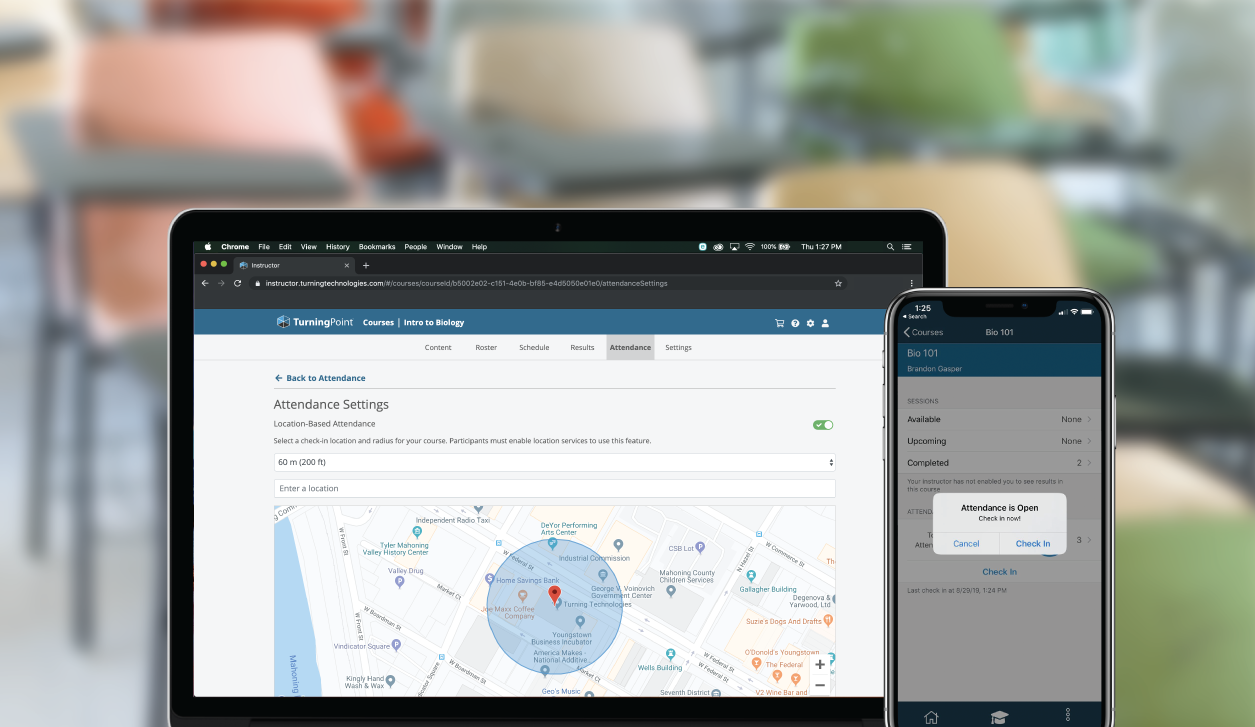
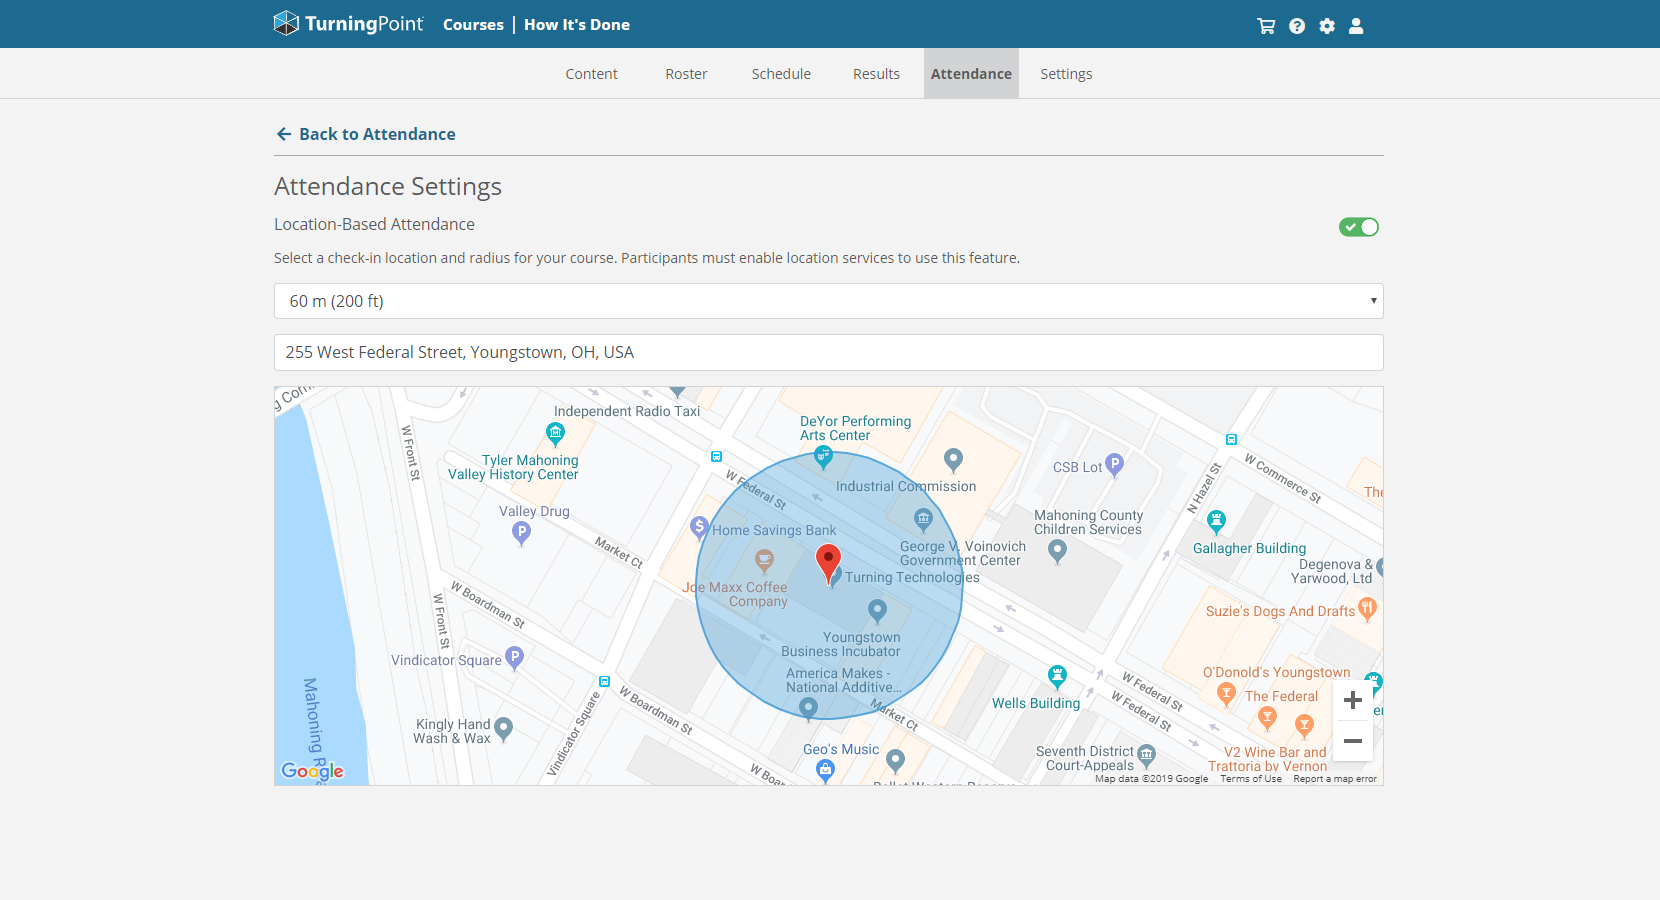
Select Attendance Settings and toggle on Location-Based Attendance. Your browser may ask to allow instructor.turningtechnologies.com to know your location—you can select allow if you want to use your current location as your attendance check-in location. Otherwise, you can close the window and then select your attendance range from the drop-down menu and then enter a physical address for your attendance check in.

Go Back to Attendance to get started! Now you just need to click Open Attendance to open the session. This will send a push notification to the participants in your course that attendance is open. If they are within your set radius of the check-in location, they will be able to check in. If they are outside of the radius they will not be able to check in and will be marked as absent.
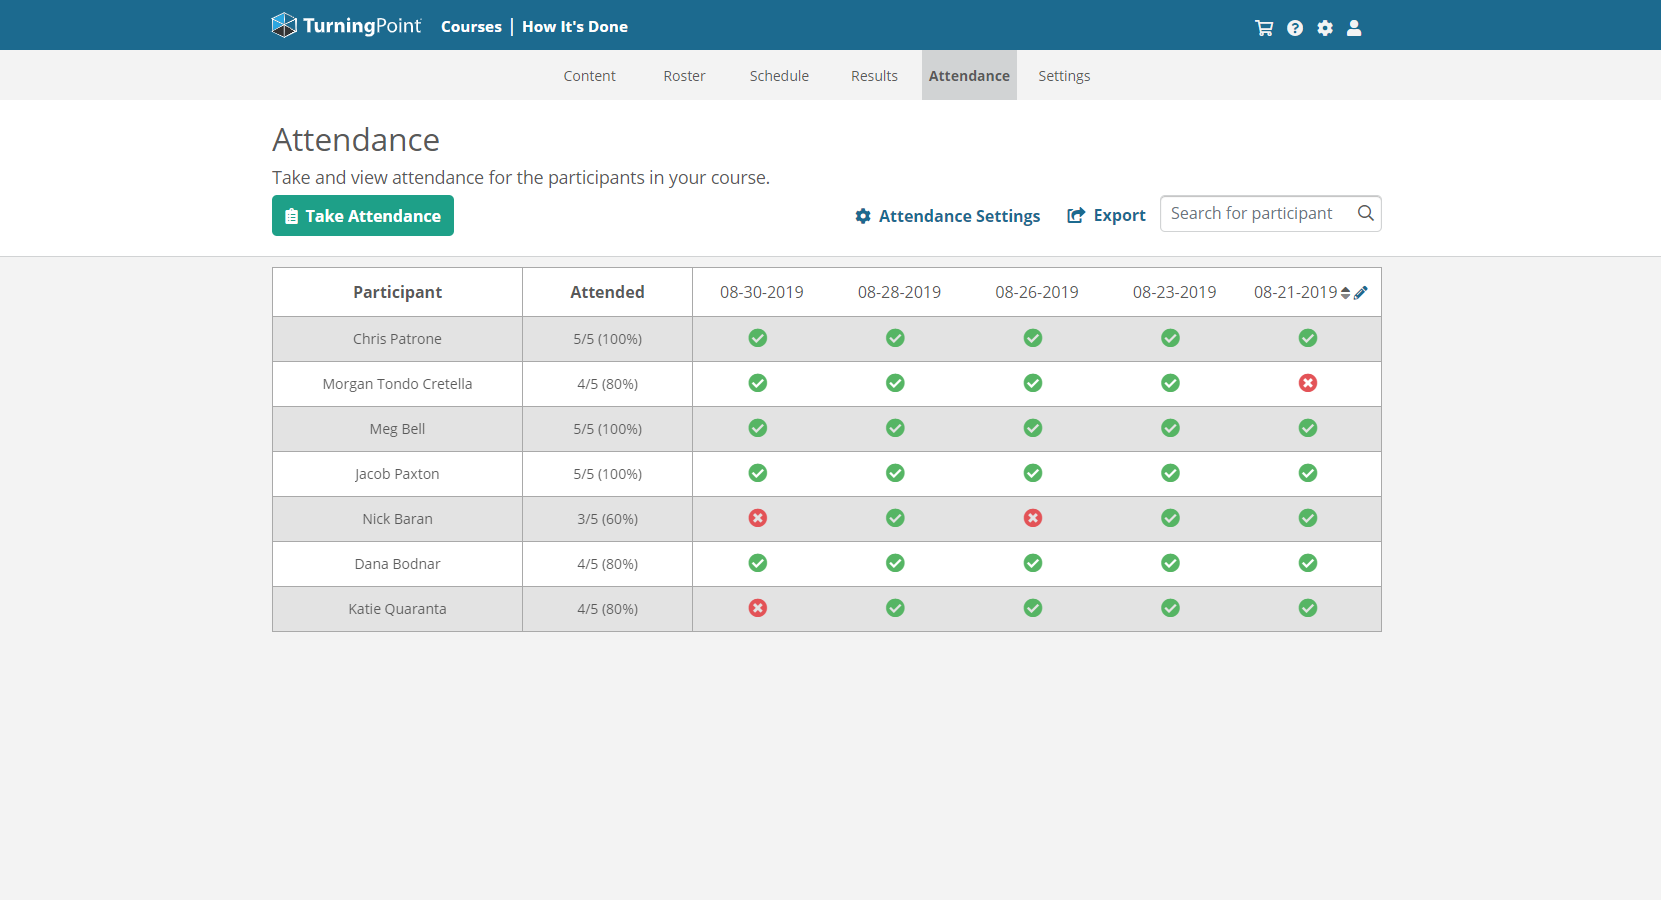
Click Close Attendance to end the session. Your participant attendance will be visible.

Now what?
At this point, you are done taking attendance but what do you do with the data you collected? You can do a few things to analyze this record:
- Sort by Participant to easily find a specific person to check on their attendance history. If your roster is very large, you can even Search for participant at the top of the table.
- Sort by Attended to see who is consistently coming to class.
- Sort by Session in order to see which session had the most absences.
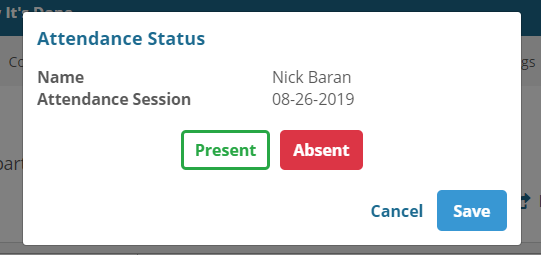
- Edit a participants’ attendance record. For example, maybe they were in class but were unable to check in because they left their phone at home. Or they could have come in late, after attendance had closed, but you are feeling generous so you want to change their status for that class. Just click on the icon below the date for the participant you would like to adjust.

- Export the attendance record to view and save a record in an excel file, or you can upload the attendance data to your LMS gradebook.
